
Storing skis or snowboards sounds simple until you’ve got a few pairs sliding around the garage, chipping edges and falling on someone every time you open the door. I’ve done the whole “lean them in a corner” thing. I’ve tried the cheap screw-in hooks. I’ve built the wood-and-bolts rack. All of it works well enough, but some setups are a lot cleaner and easier to live with.
If you’ve got a gear room, garage or entry space and want a simple, tidy setup, this breaks down a few reliable ways to build a ski rack without overcomplicating it. I’ll cover the basic DIY options first, then the setup I eventually switched to and still use now.
The setup I use now
I’ve tried a few different ski rack setups over the years, in a bunch of different houses. Right now I use a wall mounted grab style rack in the garage. It keeps the skis off the ground, holds them securely and lets me pull a pair out in seconds.
Why I landed here
I like simple. I ride most days in winter. The rack I use is clean, keeps edges from scraping each other and looks decent when friends drop in. It’s also nice not having to line up tips or fiddle with straps. Lift. Grab. Done.
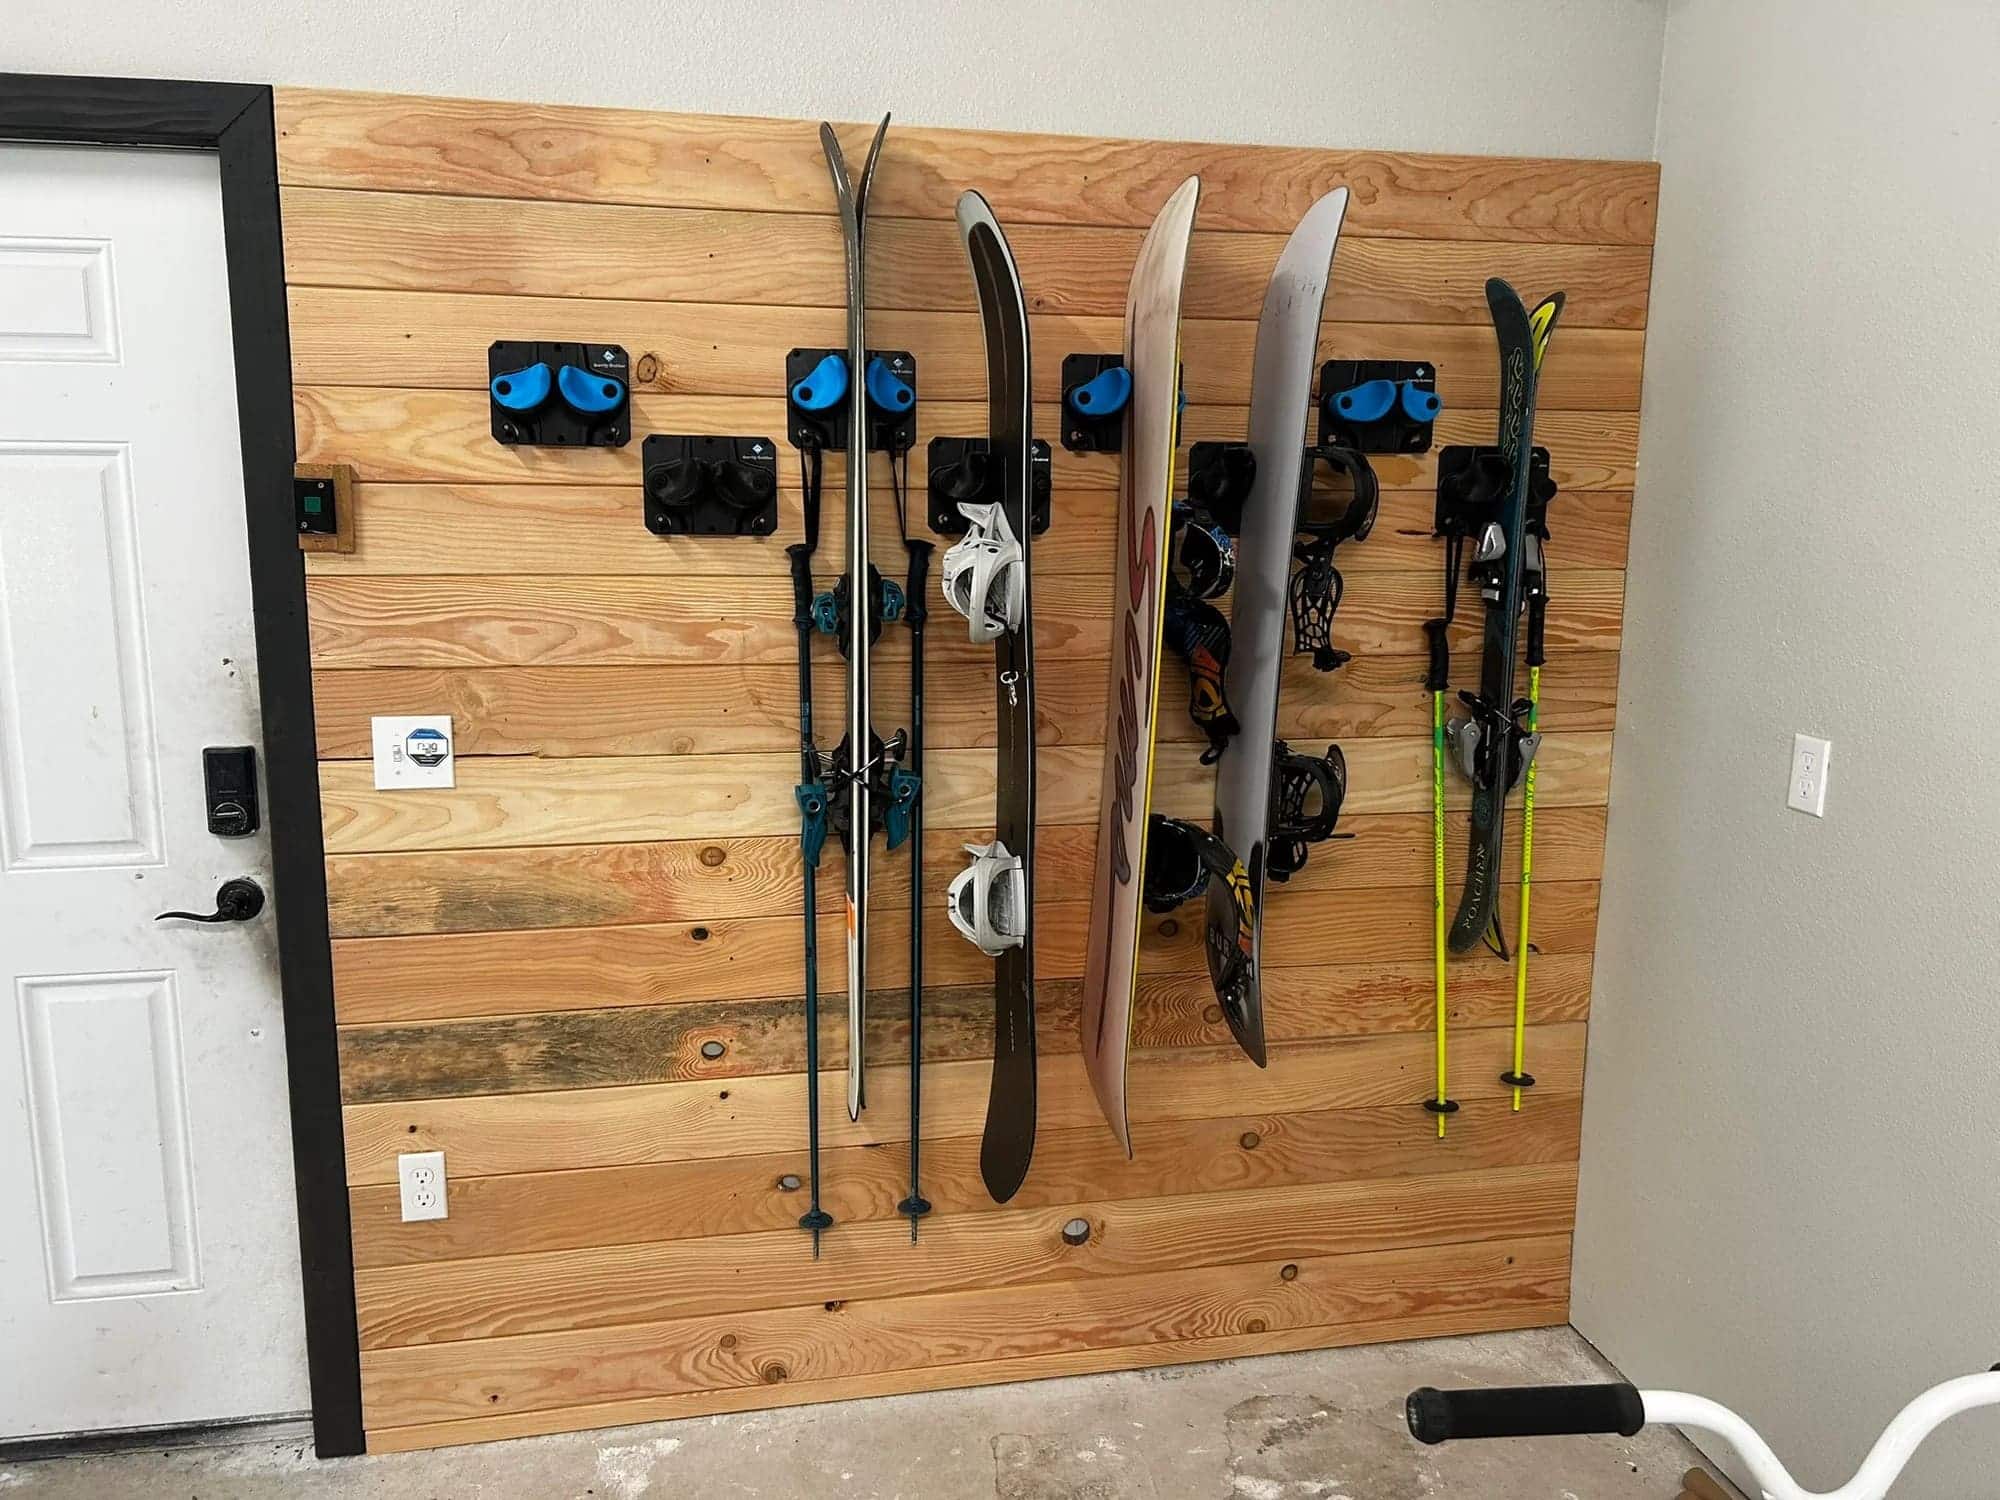
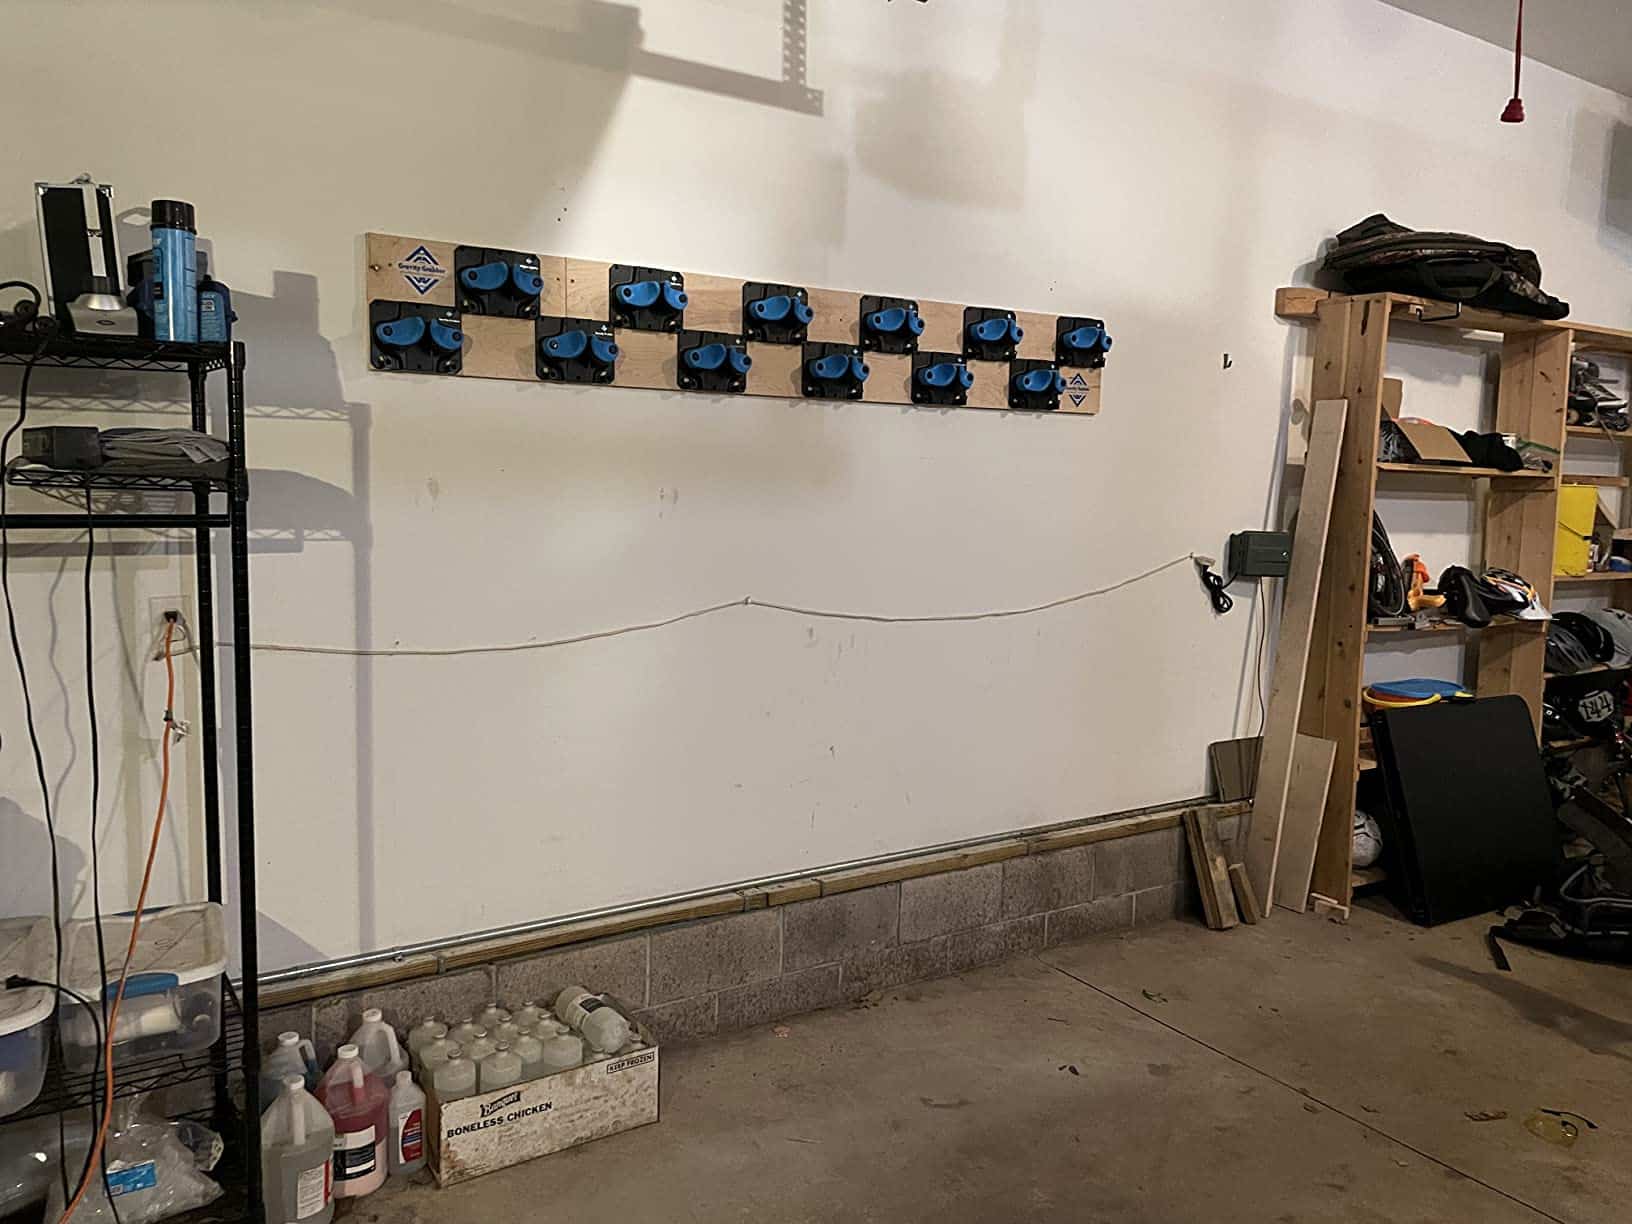
There are grab-style racks from a few brands. The one I use is the Gravity Grabber. It’s basically two little arms that hold the skis by the sidewalls so they hang cleanly. It takes a couple of screws to mount, and you can put as many as you want in a row.
I bought mine thinking it might be a bit of a gimmick, but it grew on me fast. It works, it handles fat skis without a fight, and getting a pair on or off takes seconds. If your wall isn’t ideal, you can also mount them onto a wooden board like I did in the second picture.
Is it the only way? No. If you like building stuff, a wood rack is a fun weekend project. If you just want something clean and done, this is what I’d use.
If you want to go old school with DIY materials, keep reading.
Key factors before you build
Before you start drilling holes, think about where the skis are going and how many you actually need to store. A single pair is easy. Six pairs, poles, skins and helmets suddenly eat a lot of wall space.
Keep skis high enough that the tails stay off wet or salty floors, and if you ride regularly, make sure you can get a pair out without moving everything else first. I’d also leave some spare capacity. Ski gear has a habit of multiplying…
Other Ski Rack Options
1. Simple Wall Hooks
The cheapest option. Mount two heavy duty hooks horizontally and rest the skis base-to-base, with the bindings stopping them sliding off.
They’re cheap, quick and perfectly functional. The downside is they take a little more fiddling to get the skis sitting neatly, and I’d cover the hooks with rubber or foam so you’re not resting the bases directly on metal.
Best for: garages and anyone who wants the cheapest setup that works.
2. DIY Wood Ski Rack
If you’ve got some timber and don’t mind an afternoon with a saw and drill, this is probably the best-looking DIY option. Build a horizontal rail with slots or dowels and space them to suit however many skis you own.

They’re strong, cheap to build and you can make one exactly the size you need. The obvious downside is that once you’ve built it, you’re pretty much stuck with that layout.
Quick tip: leave more space between skis than you think you’ll need, especially if you’ve got wide skis or big touring tails.
Best for: gear rooms and garages where you want something permanent without buying a rack.
3. Floor Ski Rack
A freestanding rack is the obvious answer if you don’t want to drill into a wall. Drop the skis into individual slots and move the whole thing if you ever rearrange the garage.

They can hold a lot of gear and they’re easy to build, but they take up considerably more floor space. That’s the main reason I’ve moved away from them.
Best for: garages with plenty of floor space, or anywhere wall mounting isn’t an option.
How to Build a Wall-Mounted Ski Rack
If you’re going for the option of wall mounted ski racks, here’s a quick guide. Simply choose your system (or hooks) then follow the steps below.
Tools
Drill
Level
Stud finder
Screws
Rack system or hooks
Steps
Find studs. The worst ski rack is a fallen one.
Mark height. Eye level or a little above keeps tails clear of winter crud.
Level your marks. A crooked ski wall serves nobody.
Pre-drill. Prevent wood splitting if you are building the rack yourself.
Mount rack or hooks. Tight and even. If using multiple mounts, keep spacing consistent.
Test with your heaviest skis. Better to find problems now.
Add pole hooks or a small shelf nearby. One tidy spot for everything is key.
Tips to Make It Look Better
• Keep racks evenly spaced
• Match screw heads for a cleaner finish
• Hide a boot dryer or helmet hanger nearby
• Rubber or felt pads where skis touch wood if you build your own
• Leave room for one extra pair (because it always happens)
Final Thoughts
I’ve tried pretty much every way of storing skis over the years. Hooks work, homemade racks work and freestanding racks work. If you’ve got some spare wood and don’t mind building one, there’s absolutely nothing wrong with going DIY.
But honestly, the grab mounts are what I’d put in my garage now. They’re simple, tidy and take up basically no space. If I add another pair of skis, I can just add another mount.
That’s the setup on my wall now, and the one I’d build around again.
Just do not lean your skis in a corner. We’ve all done it. It never ends well.

